


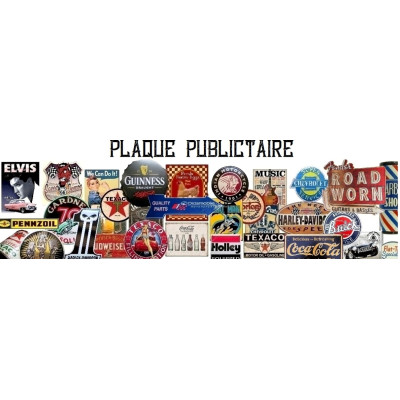
Decorating a wall with vintage metal signs
Voici la suite de la traduction en anglais, conservant un ton dynamique, fluide et adapté au style du texte d'origine.
A blank wall in a garage is a bit like a jukebox without a record. To give it character with metal signs, it all comes down to three steps: choosing the right models for the room, arranging them with rhythm, and mounting them securely based on their weight and the wall. From garage, bar, or kitchen themes to drilling and workshop safety precautions, here is everything you need to build a wall that turns heads.

Which vintage signs should you choose for each room?
Before playing around with the layout, everything starts with the room itself. A garage, a bar, and a living room don’t share the same vibe: themes and sizes change accordingly.
Take a close look at each sign, then keep the designs that fit the room’s atmosphere.
Choosing the size, finish, and condition
Behind the word "vintage," there are three categories: authentic period pieces, recent retro-style reproductions, and contemporary designs inspired by them. Once you’ve identified the category, compare the dimensions, actual weight, material, finish, and pre-drilled holes. Ordering a custom design? Double-check the final dimensions and text legibility before placing your order.
An authentic period sign deserves a true collector's eye: flatness, condition of the holes, and corrosion. The key difference lies in the nature of the oxidation: a nice, stable patina adds character, whereas deep-eating rust is a problem.
Creating a garage or workshop atmosphere
In the workshop, old-school ads, technical inscriptions, retro typography, and weathered finishes instantly set a speed shop vibe. Déco US offers over 2,500 metal models featuring American automotive, gas, pin-up, or music ads. Round, domed, die-cut, or license plate style: there is plenty to choose from in the metal sign catalog.
In a garage, a well-sized decorative metal sign can act as the main feature: a 40 cm (16 in) domed Gulf sign or a 60 cm (24 in) round Texaco sign, for example. A 50 × 45 cm (20 × 18 in) die-cut and stamped Hot Rod sign adds depth that catches the light. It belongs to the Hot Rod and Kustom sign collection—with their American cars, speed shops, and Rat Fink—perfect for anchoring an entire wall layout around a central decorative metal sign.
Adapting themes for the bar, kitchen, and living room
At the bar or coffee corner, drinks, breweries, and vintage brand signs group together well around a focal piece. A cluster of 3 to 5 themed signs is enough to set the mood. In pure diner tradition, the 30 × 20 cm (12 × 8 in) Big Boy "Open 24 Hours" sign fits right in effortlessly.
In the kitchen, use the same recipe in a dedicated corner: coffee or recipe signs, kept away from cooking areas since they are not a substitute for a backsplash. In the living room, on the other hand, the star sign should blend nicely with existing picture frames and furniture colors.
Looking to group multiple small formats? Déco US offers over 400 signs sized 30 × 20 cm (12 × 8 in)—covering cars, pin-ups, or oil brands—in its small decorative tin sign collection. US license plate formats (around 30 × 15 cm / 12 × 6 in) complement these vintage decorative metal signs very well.
Pro Tip:
Go for a large-format sign
On a large wall, a single big advertising sign can anchor the whole decor and serve as the focal point for your arrangement.
How to arrange a gallery wall of metal signs?
Now that the models are picked out, it's time to set the stage. A high-impact wall comes down to a main feature, even spacing, and a setup that respects the room's layout.
Defining the focal point and balance
On its own, a large advertising sign can carry an entire wall decor. First, measure the available surface area, then make sure the sign is easily readable from the room’s entrance.
Around this star piece, there are two approaches. A uniform grid layout creates a clean, almost military look. Conversely, an asymmetrical composition offers more swing, but requires extra planning to stay balanced.
When combining multiple sizes, each decorative wall sign carries visual weight based on its size and color. Distribute large formats and bold colors evenly across the surface rather than clumping them into a single corner.
Testing alignments and spacing
In practice, start by laying out the signs on the floor to try different combinations, then take a photo of your favorite setup. Next, cut out paper templates to the exact dimensions of each sign to test the look directly on the wall. For a tight arrangement, aim for a 4 to 7 cm (1.5 to 3 in) gap as a guide; when dealing with different shapes, measure between the edges rather than the mounting points.
A quick calculation helps picture the final layout. On a 240 cm (8 ft) wide wall, a composition can span 120 to 150 cm (4 to 5 ft) using one 40 × 30 cm sign, four 30 × 20 cm signs, and two 20 × 15 cm signs. A horizontal row of five 30 cm signs separated by four 4 cm gaps will span 166 cm (5.5 ft).
Considering wall space and room layout
All that's left is fitting everything into the reality of the room. Identify outlets, switches, furniture, doorways, and pathways before deciding on the final spot. A line of signs above a workbench, bar counter, or furniture should never overlap those functional areas.
Will your wall expand as you find new pieces? A stable mounting backing board designed for the total weight prevents you from drilling new holes every time you add a sign. Using shared hanging points offers the same flexibility.
Bonus: This backing panel (or the signs themselves) easily hides small marks or slightly damaged areas. However, they won't fix structural cracks, water damage, or crumbling walls. In rental properties, public tenant guidelines remind renters that certain holes or damage attributable to the tenant may remain at their expense upon move-out.
Which mounting option to choose for the sign and the wall?
The composition is locked in; now onto the hardware. Mounting depends on two factors: the sign (its weight and hanging points) and the wall (its material and condition). Depending on the setup, you will either screw, hang, or mount without drilling.
Checking weight and wall type
Before heading to the hardware store, weigh the sign, check its holes or hangers, and make sure you're allowed to drill. For large pieces, measure the actual center-to-center distance between holes to determine how many mounting points are required. From there, every wall type has its solution:
Solid masonry: Concrete and stone require screws and wall anchors designed for solid materials.
Hollow brick or block: Drywall anchors or hollow-wall anchors are essential—never default to standard concrete plugs.
Wood: Screws must bite into a solid structural element, not just surface paneling or wainscoting.
On drywall partitions, weight capacity varies by board type, load distribution, and spacing. Standard manufacturer guidelines suggest up to 30 kg (66 lbs) per anchor, spaced at least 60 cm (24 in) apart for standard setups. On reinforced drywall, a 5 mm wood screw can hold up to 20 kg (44 lbs) per point. With heavy-duty hollow-metal expansion anchors (toggle bolts), capacity reaches up to 60 kg (132 lbs), with a minimum spacing of 40 cm (16 in) and a safety factor of 3.
Choosing mechanical fasteners without damaging the sign
Note: These load values always depend on the wall type, installation quality, and testing conditions. Adding a second anchor does not automatically double the load capacity, and high tensile strength alone doesn't guarantee a sign will stay secure on the wall. Hardware technical catalogs provide maximum allowable tensile loads for standard nylon plugs under controlled test conditions.
Once the wall anchor is selected, appropriate screws do the rest. To avoid warping the metal sheet or chipping enamel signs, slip plastic washers under the screw heads and hand-tighten with a screwdriver at the end.
| Nylon Anchor Size | Drywall (12.5 mm / 1/2 in) | Hollow Brick | Concrete |
| 5 × 25 mm | 12 daN (~12 kg) | 13 daN (~13 kg) | 40 daN (~40 kg) |
| 6 × 30 mm | 15 daN (~15 kg) | 15 daN (~15 kg) | 95 daN (~95 kg) |
| 8 × 40 mm | 15 daN (~15 kg) | 25 daN (~25 kg) | 110 daN (~110 kg) |
| 10 × 50 mm | 15 daN (~15 kg) | 25 daN (~25 kg) | 215 daN (~215 kg) |
Mounting without drilling or keeping the layout flexible
Don't want to bring out the drill? For small, lightweight signs, heavy-duty mounting tape or picture hanging strips work fine on clean, dry, smooth, and solid walls—after verifying load ratings, paint adhesion, and removal instructions. Below 15 °C (59 °F), some removable strips become harder to detach.
A small cord threaded through the top two holes also allows lightweight signs to hang from a securely anchored hook (though not recommended for heavy enamel signs). Magnetic strips or picture ledges offer additional flexible options.
How to mount and secure signs for the long term?
With hardware in hand, installation follows a simple process: mark layout points, check the wall, drill cleanly, and test stability. Garages, workshops, and bars then require a few extra precautions.
Marking points and inspecting the wall
Measure each sign and the distance between its mounting holes. Transfer the outlines to the wall using your paper templates, then mark the fixing points using a tape measure and a level. Before drilling the first hole, run a few checks:
Material and condition: Identify the substrate to choose the correct drill bit and anchor type.
Hidden utilities: Scan for cables and pipes in the drilling zone.
Asbestos: For suspicious materials in buildings constructed prior to regulations, check safety documentation before starting work.
Time needed: Leave a margin for adjustments and unexpected delays.
Time-wise, allow 5 to 15 minutes for a lightweight sign on an existing hanging point, and 15 to 30 minutes when drilling and inserting wall anchors. A small multi-sign layout takes 30 to 90 minutes. For an entire wall, plan for anywhere from an hour to several hours.
Drilling, hanging, and checking stability
Drill to the diameter, depth, and mode specified for the anchor: an oversized hole prevents hollow-wall anchors from expanding properly. Wearing safety glasses and gloves, skip heavy power tools that are overkill for the task. Safety standards remind us that respirable crystalline silica, released when drilling into certain mineral materials, can pose serious health risks.
Once the sign is mounted (without crushing the metal plate), check its alignment with a level, test the strength of each point, and ensure there is no wobbling. Did an old hole rip out plaster? Fill it properly rather than reusing it.
Adapting safety measures for garages, workshops, and bars
In a workshop, mechanical fasteners are preferred wherever signs risk being bumped, snagging a jacket, or vibrating. However, they are not a replacement for a tool pegboard.
In a bar, signs should leave walkways clear, maintain access for cleaning, and keep safety equipment visible. For public establishments, fire safety regulations impose specific flame-retardant standards when 3D/raised wall decorations cover more than 20% of vertical surfaces.
Where condensation, bumps, or frequent cleaning occur, regularly inspect mountings, edges, and holes—that is where rust attacks first. For printed or varnished signs, a soft cloth is all you need; never use abrasive cleaning products.
Dress up your wall with vintage signs
Metal signs for the garage, workshop, bar, or kitchen: find the perfect pieces to bring your wall to life.
Discover the shop
Frequently Asked Questions
Can you stick a metal sign onto a textured wall, peeling paint, or delicate wallpaper?
Adhesives do not stick well to textured, damp, dusty, or crumbling walls. On peeling paint, tape can tear off the coating while staying stuck to the sign. Delicate wallpaper risks tearing during removal: a standalone mounting panel is a better choice if the arrangement needs to be moved later.
How do you prepare a damaged wall before mounting metal signs?
Drywall manufacturers recommend cleaning the wall, removing loose material, patching with an appropriate filler, letting it dry, and sanding smooth. In case of water damage, resolve the root cause first. A sign can conceal small holes, but its new anchors must anchor into a solid surface.
How are Déco US signs designed for wall mounting?
Pre-drilled signs from Déco US simplify installation.
- Comments
- Facebook Comments